ASU Wired NAC - How do I Manually Configure 802.1X Wired Authentication on Windows 7?
Use the following instructions to manually configure 802.1X authentication on Windows 7 for wired LAN connections.
This is necessary in order to connect to the authenticated ASU network when using a wired network LAN connection.
Without authenticating, your system by default will connect to the untrusted network segment, 3580. Eventually, this segment will have Internet only access.
1. Enable 802.1x according to instructions in the article ASU Wired NAC - AutoConfig 802.1X Wired Authentication on Windows 7.
2. Right click on your network adapter (Local Area Connection Properties) icon in the Windows Taskbar and select Properties.
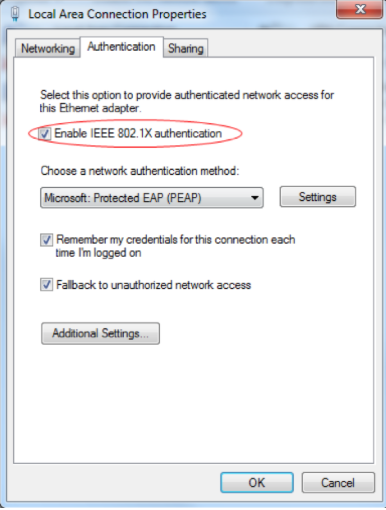
3. Click on the Authentication tab and select the checkbox to Enable IEEE 802.1X authentication.
4. Under the Choose a network authentication method: dropdown, select Microsoft: Protected EAP (PEAP) from the available choices.
5. Now click Settings.
NOTE: Do not select Additional Settings.
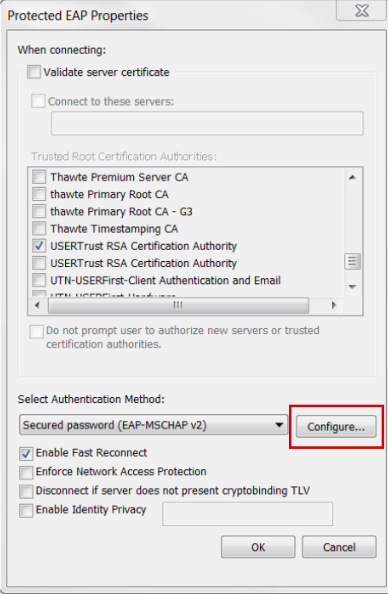
6. On the Protected EAP Properties tab, select the checkbox “UserTrust RSA Certification Authority” then be sure to uncheck Validate server certificate as shown below.
7. Then click Configure next to the menu that says Secured password (EAP-MSCHAP v2).
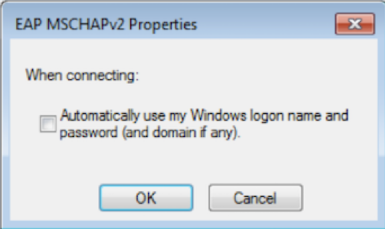
8. You will see an EAP MSCHAPv2 Properties window like the example below.
9. Be sure that the When connecting checkbox is unchecked and select OK. You will be returned to the previous screen. Select OK again.
10. This will bring you back to the window shown below.
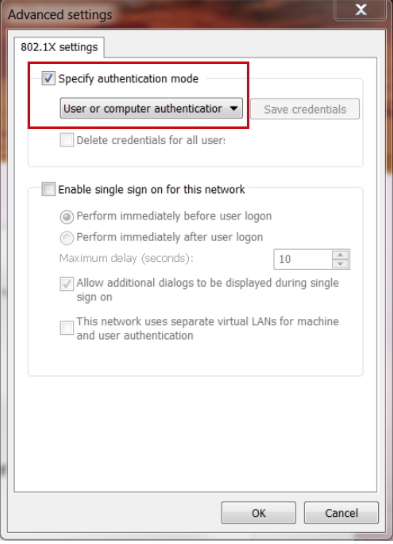
11. Click Additional Settings...
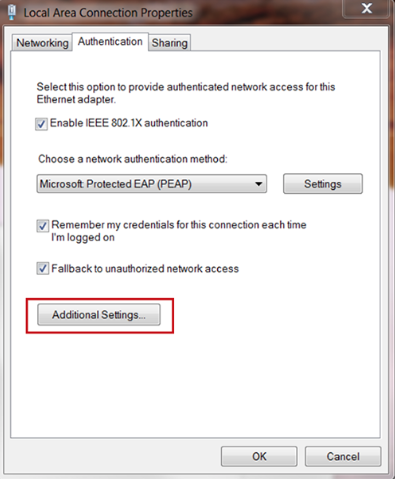
12. Make sure the checkbox next to Specify authentication mode is checked. Choose User or Computer authenticator from the drop down menu below.
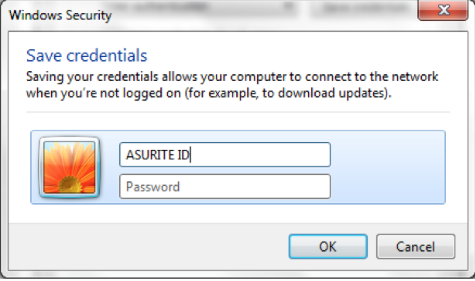
13. When you restart your computer and plug into a wired Ethernet jack to connect to the encrypted ASU network, the following Windows Security window will be displayed.
14. Enter your ASURITE ID in the first field and your password in the second and click OK.
Need additional help? Access 24/7 live chat, create a case from your My ASU>Service tab or call the ASU Help Center at 855-278-5080.

